Don’t let a ripped or leaky wetsuit keep you out of the water. Photo: Evan Dorian // Unsplash.
Editor’s Note: Welcome to The Inertia. Find out more about us and explore some of our archives here. For more gear-related coverage and features, click here.
Ahh wetsuits. They do so much for us as surfers, and yet, they’re so damn finicky. They need to keep us warm, but also stay flexible. You should rinse your wetsuit with water – but not hot water. Dry them out, but not in the sun. They’re expensive, but deteriorate rather quickly. And to cap it all off, they’re way too easy to rip.
With that in mind, a little know-how when it comes to fixing a wetsuit yourself can go a long way towards extending the life of your suit and delaying your next wetsuit purchase just a little longer. Proper wetsuit care can also help, but if you’re already past that point and need to fix some leaks, read on for best-practice tips and tricks on repair that I’ve learned, mostly through trial and error.
Here’s What I Use To Fix My Wetsuits

The stuff your dentist hands out for free and you’ve never used should do nicely. Photo: WS
Dental Floss
It’s thin, unobtrusive, water-resistant, and probably your best option for sewing a wetsuit if it comes to that. Best for heavy-duty repairs in high-movement areas, the downside is that it creates more holes in the material you’re working with (i.e., your wetsuit), which will need to be sealed as well.

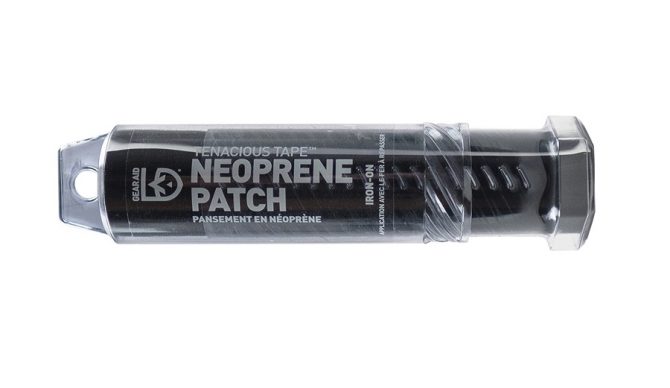
GearAid Tenacious Tape Neoprene Patch
GearAid Tenacious Tape is great for sealing up pesky seams and adding reinforcement to repairs made with Aquaseal or neoprene cement, as well as waterproofing sewn areas. It can also be used on its own for simple repairs. I’ve found it can sometimes be tough to get it to bond to the area I’m working on. Be patient, and follow the directions on the package so as not to melt a hole in your precious suit.

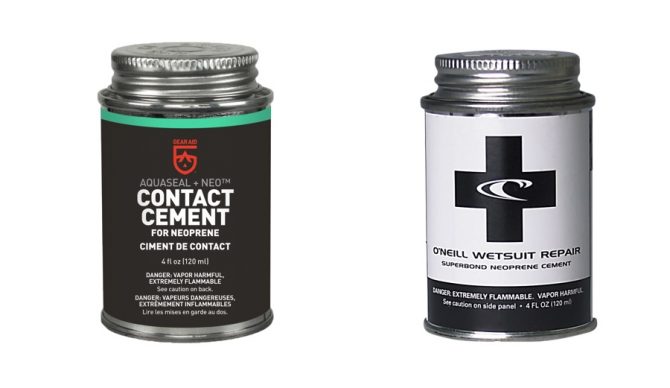
Neoprene Cement
This stuff dries really fast, and it’s great for waterproofing the outside of a seam. It can be a bit bulkier when it dries than Aquaseal. It’s also probably the most widely available, with plenty of identical versions from different manufacturers. I’ve linked to the GearAid version here because it’s the cheapest I’ve found.

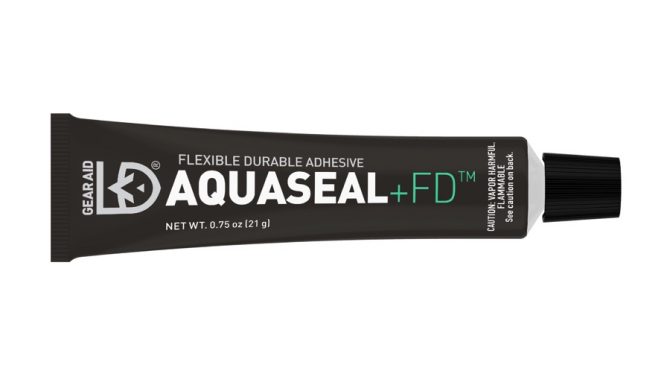
GearAid Aquaseal FD
Aquaseal generally dries slower and tends to seep in a bit more than Neoprene Cement for less-obtrusive repairs. It might take a couple of coats to attain full watertightness.
What is Better, Aquaseal or Neoprene Cement?
Both are pretty similar. Neoprene Cement tends to dry faster and sits on the surface more than Aquaseal, making it more obtrusive but probably a bit more waterproof, as you can really glob it on in a thick coating. It’s also a bit more rubbery and flexible than Aquaseal, at the cost of some strength. Both products have a problem with drying – once you open the tube or canister, they tend to turn into a hardened, unusable chunk quickly. GearAid recommends you try freezing your adhesive products to make them last longer, and then warming them up by running the tube/canister under warm water before use.

A small fin slice in a low-consequence area (below the knee) needs nothing more than a dab of neoprene cement of Aquaseal. I’d probably go with Aquaseal here since it’s a blue suit. Photo: WS
How to Fix A Tear in Your Wetsuit
Leaky seams can be annoying but generally are not a session ender. However, a gaping hole in your wetsuit is a different story. For actual tears in your suit, you’ll want to get after the problem right away to avoid letting it get any bigger. The first question to ask yourself is just how much attention the rip in question needs. A small fin-slice on the ankle or calf probably only needs some Aquaseal, cement, or a neoprene patch. For tears more than an inch in length, I often like to double down by using Aquaseal or cement and then a neoprene patch on top to make sure no water can get in, as well as prevent the tear from reopening. Always make sure your suit is completely dry before trying to repair it.

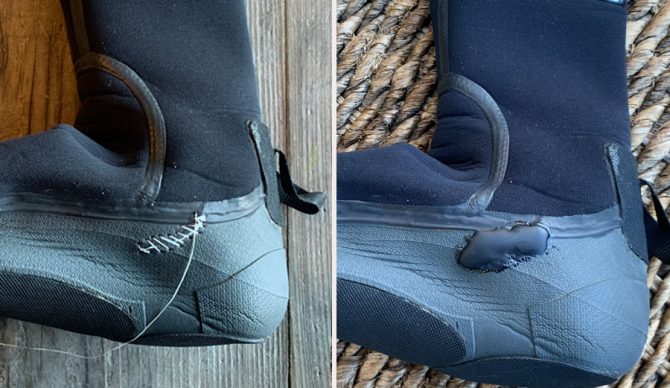
A torn bootie definitely counts as “high wear” enough for a couple of stitches and a glob of neoprene cement. Photo: WS
How to Sew a Wetsuit Tear
Not every repair will need the strength of a sewn repair, but high-flex areas and larger holes, especially if the edges don’t cleanly come together, are both candidates for throwing a few stitches down.
Grab some dental floss and a sewing needle; anything with a head large enough to fit the floss through should do just fine. Make a knot (for comfort’s sake, I try to keep knots on the outside) and start sewing. Simple, tight stitches are what I go for, just make sure that you’re catching enough material in each stitch so that they won’t tear out. Once done, tie off, and voila. You could call it there, but for true watertightness, I would put down a layer or two of Aquaseal or neoprene cement. You can also use a neoprene patch here, especially useful on the inside to keep the stitches from chafing.

With the amount of stretching that it sees and the fact that it’s usually underwater, eventually the crotch of any wetsuit will need to be resealed. Photo: WS.
How to Waterproof a Leaky Wetsuit Seam
Ahhh, the pesky wetsuit seams. I’m still waiting for the day that a completely seamless wetsuit is invented. Until then, I’ll keep my repair materials at hand. Note that by “leaky wetsuit seam,” I do not mean “completely torn seam.” For that, you’ll definitely want some floss stitches or a neoprene patch, maybe both.
Here, you’ve got a few different options. I like to use Aquaseal for a very unobtrusive seal on either the inside or the outside of the suit. Because of how much it soaks into the actual seam itself, it may take a couple of layers. Neoprene cement does a bit better in one coat as it stays on the surface more, but I wouldn’t recommend using it on the inside, except maybe as a very thin layer: it’s more likely to rub off or cause chafing. Seam tape is a great way to go. There are plenty of pre-cut options on Amazon, but I prefer to cut strips of the same Neoprene Tape I use for patches.
Ultimately, unless you really, really care about the aesthetics, it’s hard to go wrong when repairing a wetsuit. The best part is that more is often better. If you give a home repair a go and it doesn’t keep as much water out as you’d like, just give it another coat, or try layering a different kind of material on, like an iron-on patch. Good luck!
Editor’s Note: For more gear reviews and features on The Inertia, click here.

